LLM Agents Explained: From Zero to a SQL Agent

It was about time I wrote this article. Everyone seems to be talking about LLM agents. I’ve personally seen a huge number of LLM agents being built for different domains and data. I think knowing at least the basics, which can later be generalized to more complex scenarios, is worth it. By the end of this article, I’m sure you’ll close this tab feeling good about something you’ve been hearing about but didn’t fully understand.
Okay, let’s get started.
I want to clarify who this guide is for. If you’ve ever thought one of the following, this is definitely for you:
- "I understand Python, but LLM agents still feel confusing."
- "I hear terms like agent, tools, graph, state, prompt, retry, planner, executor, but I don’t really get it yet."
- "I want one example that is simple enough to understand, but real enough to use in actual projects."
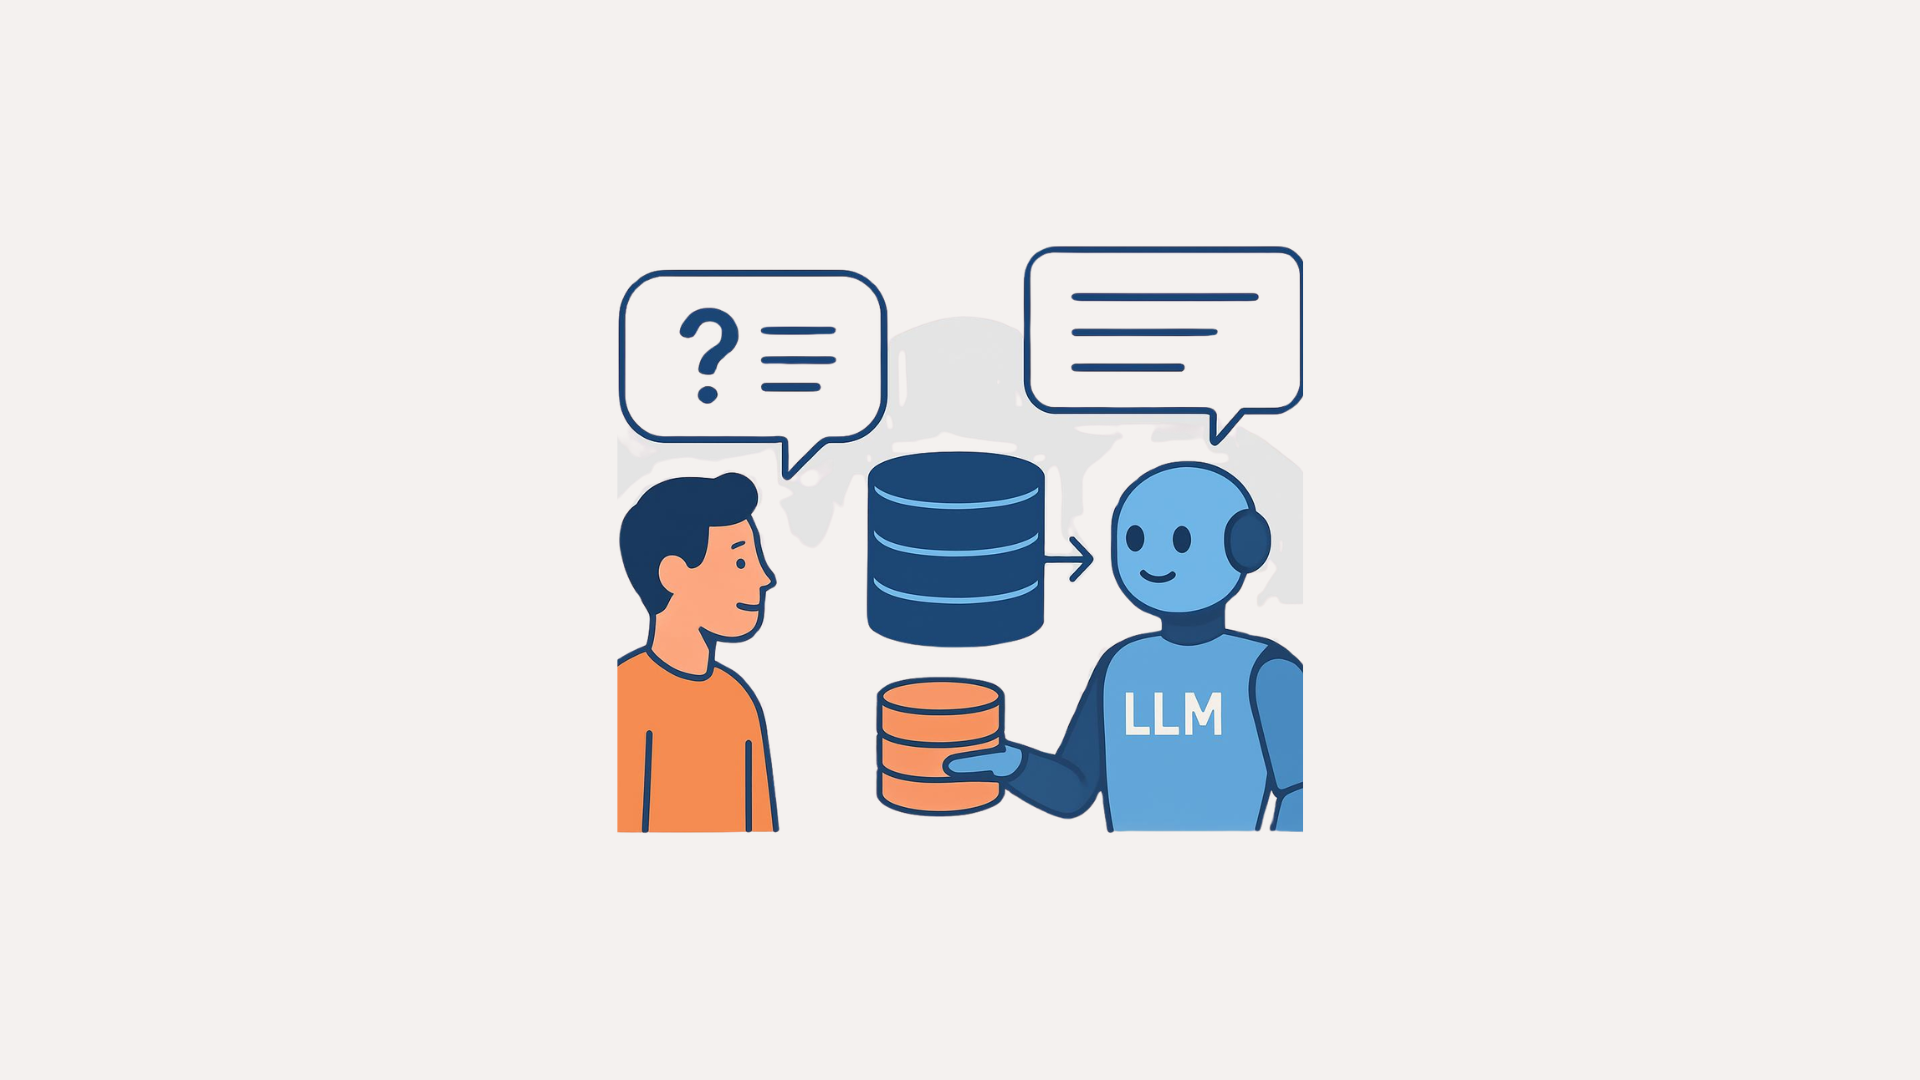
This is not a shallow overview. This is a full, practical, beginner-friendly guide to building an LLM agent in Python. Specifically, we’ll build a SQL agent. A relational database will contain some sample data, and we’ll ask questions about it. The LLM will query the database, retrieve relevant data, and respond in natural language. That might sound like a lot, but stay with me. By the end, you’ll be able to generalize this approach to other data sources as well. Right now, we just need clarity on the fundamentals.
We’ll use:
- LangGraph for orchestration (i’ll explain this soon)
- SQLite as our database
- A chat model for reasoning
- Retry logic so the agent can recover from bad SQL
By the end, you’ll understand:
- What an LLM agent really is
- Why it’s different from a normal LLM call
- What tools are
- What LangGraph does
- Why state matters
- How a SQL agent works internally
- How retries improve reliability
- How to adapt this to real projects
We’ll focus on why each part exists. And yes, there will be working code.
Let’s start with the theory.
What is an LLM agent?
Okay, this is important. As you might already know, a normal LLM call looks something like this: you send text in, and the model sends text out. This is the same, whether with GPT, Gemini, or locally hosted Ollama or HuggingFace models.
Example:
response = model.invoke("What is the capital of Victoria state?")The model answers from what it already knows. Here are responses from some models.
GPT-5.4: "The capital of Victoria is Melbourne."
Gemini-3: "The capital of Victoria is Melbourne."
Llama-3.1-8b: "The capital of Victoria state in Australia is Melbourne."
That’s correct. This is useful, but it has limitations. How?
Now imagine asking:
Which customer placed the most orders last month in my database?I know this sounds silly. How will the LLM know what's inside my database? Exactly. This is where an agent comes in. An LLM agent is a system where the model does not only write text, it can also decide what action to take, use tools, inspect results, try again if something fails, and produce a final natural language response for the user.
So in simple terms: an agent is an LLM that can think in steps and use tools to get a given task done. That's it. Now let’s get to the other question.
What is a tool?
You might already be aware of functions in Python. Something like below:
def function_name(parameters):
    # Code block
    return result
Functions are something that take in some parameters, do something using those parameters, and return something. Well, to be honest, a tool is simply a function the LLM is allowed to use. There you go, no rocket science. Examples of such functions might include searching the web, querying a database (listing tables, getting schema, executing SQL), accessing an API endpoint, etc. You can think of the LLM as the brain, and tools as the hands. The brain decides and the hands act. With tools, the LLM gets to interact with the real world.
For instance, for a SQL agent, typical tools will be:
- list_tables: shows which tables exist
- get_schema(table_name): show columns and types
- run_sql(query): executes SQL
These tools are pretty much the essentials to build a surprisingly useful system. More sophistication can be added later, but I think you get the gist here.
What is a SQL agent?
Well, since we will be building a SQL agent in this guide, it is necessary to get an overview of what exactly such an agent is.
A SQL agent is an agent that answers natural language questions by interacting with a database. For instance:
Which customer spent the most money overall?For this question, a well-implemented SQL agent does something like this: understand the user question, inspect available tables, inspect relevant schema, write SQL, execute SQL, inspect the retrieved results, and finally write a natural language answer.
Why LangGraph?
Now let us understand the orchestration layer. We could easily write the whole agent as plain Python with a bunch of if statements. That should work, although I haven’t personally done this. But LangGraph makes our lives a whole lot easier. How?
LangGraph lets us represent our agent as a graph made of following components:
- state
- nodes
- edges
- conditional edges
What is a state?
State is the shared memory of the workflow. It stores things like: (i) the user question, (ii) generated SQL, (iii) execution results, (iv) error messages, (v) retry count, (vi) final answer, etc. Basically, think of state as the agent's notebook. Every node in the graph reads from the notebook and writes updates back to it based on what happened in that node.
What is a node?
A node is one step in the workflow. For example, for our SQL agent, you can picture the following LLM activities as nodes:
- node 1: list database tables
- node 2: get schema
- node 3: generate SQL
- node 4: execute SQL
- node 5: generate final answer
Yes, you got it right. A node is usually just a Python function.
What is an edge?
An edge says what step comes next. For instance, (i) after listing tables, go to get schema or (ii) after generating SQL, go to execute SQL.
What is a conditional edge?
A conditional edge means going to different next steps depending on what happened. I think this should be made explicitly clear, as this functionality introduces a non-linear workflow to our agent. Here are some examples:
- if SQL execution succeeded -> go to final answer
- if SQL execution failed and retry count is below limit -> go back to SQL generation
- if retry limit is reached -> stop with a graceful error answer
This is the reason why LangGraph makes sense and feels natural for agents. Agents rarely operate in a linear workflow. They often need to branch, loop, and recover. This is something even we humans do. Suppose we are given a database to explore and we need to answer a question against that database. A human analyst will start inspecting the schema, write SQL and execute it, fix syntax errors if they show up, and finally present the results. That kind of workflow is what makes agents powerful. That is exactly the kind of workflow we are going to design and code in this guide. Once you understand the basics here, writing complex non-linear workflows for LLM agents is going to be quite easy.
The Agent we will Build
Enough with the theory, lets get to the real work now.
Here’s the workflow we will be building. This, I believe, will be the perfect learning example because it contains almost every important idea behind agents.
User Question
↓
List Tables
↓
Get Schema
↓
Generate SQL
↓
Execute SQL
↓
[If error and retries left] -> Generate SQL again
↓
Generate Final Answer
↓
Return Response
This workflow has nodes, edges, and conditional edges. And yes, a state is definitely going to be there, as it is a notebook every node is going to read from and write to.
Installing packages
Let's start with installing the required Python packages.
pip install -U langgraph langchain langchain-groq langchain-community sqlalchemyHere are the project homepages for each of these Python packages we are installing.
- langgraph: This library will let us define our workflow: state, nodes, edges, and conditional edges.
- langchain: This will give us common building blocks such as handling models and messages.
- langchain-groq: This will let us access open-source models such as Llama and GPT-OSS on the Groq platform. Why Groq? Well, I could have demonstrated this guide with the latest GPT model, but OpenAI requires you to deposit at least $5 AUD in credits. Groq gives free access, with a certain limit on the number of calls. Therefore, using Groq makes sense for free and efficient access to an LLM as large as GPT-OSS 120B. Yeah, let’s use that model. It is OpenAI’s largest open-weight model as of writing this guide. And since we are using LangChain integrations, swapping the LLM is going to be easy. I’ll talk about that later at the end of this guide. For now, to get your free Groq API key, go here: https://console.groq.com/keys (create an account and you’ll be good to go).
- langchain-community: This will provide us with some useful integrations. What exactly, we’ll see that later.
- sqlalchemy: This will help LangChain talk to SQL databases.
Let's code step-by-step.
Importing required packages
import os
import sqlite3
from typing import TypedDict, Optional

from langchain_groq import ChatGroq
from langchain_community.utilities import SQLDatabase
from langgraph.graph import StateGraph, START, END

# IMPORTANT: Add your Groq API key here
GROQ_API_KEY = "YOUR_GROQ_API_KEY"- sqlite3: Its Python's built-in SQLite library. We will use it to create a sample local database.
- TypedDict: This helps us define the structure of state. It is like saying our state dictionary must contain these fields.
- ChatGroq: This is chat model interface. It can be easily swapped for another LLM provider. For instance,
from langchain_openai import ChatOpenAIfor using OpenAI's models. - SQLDatabase: This is a wrapper around SQLAlchemy/database access. It gives us functions such as
get_table_info(),run(query). - StateGraph, START, END: These are from LangGraph.
- StateGraph: The graph builder.
- START: Node where execution begins.
- END: Node where execution stops.
Creating a sample database
def create_sample_database(db_path: str = "sales.db"):
conn = sqlite3.connect(db_path)
cursor = conn.cursor()
# Drop tables if they already exist
cursor.execute("DROP TABLE IF EXISTS orders")
cursor.execute("DROP TABLE IF EXISTS customers")
# Create customers table
cursor.execute("""
CREATE TABLE customers (
customer_id INTEGER PRIMARY KEY,
name TEXT NOT NULL,
city TEXT NOT NULL
)
""")
# Create orders table
cursor.execute("""
CREATE TABLE orders (
order_id INTEGER PRIMARY KEY,
customer_id INTEGER NOT NULL,
order_date TEXT NOT NULL,
amount REAL NOT NULL,
FOREIGN KEY (customer_id) REFERENCES customers(customer_id)
)
""")
# Insert sample customers
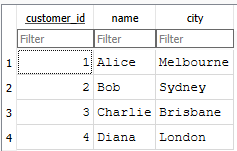
customers = [
(1, "Alice", "Melbourne"),
(2, "Bob", "Sydney"),
(3, "Charlie", "Brisbane"),
(4, "Diana", "London"),
]
cursor.executemany(
"INSERT INTO customers (customer_id, name, city) VALUES (?, ?, ?)",
customers,
)
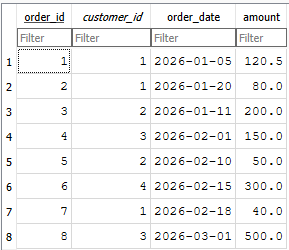
# Insert sample orders
orders = [
(1, 1, "2026-01-05", 120.50),
(2, 1, "2026-01-20", 80.00),
(3, 2, "2026-01-11", 200.00),
(4, 3, "2026-02-01", 150.00),
(5, 2, "2026-02-10", 50.00),
(6, 4, "2026-02-15", 300.00),
(7, 1, "2026-02-18", 40.00),
(8, 3, "2026-03-01", 500.00),
]
cursor.executemany(
"INSERT INTO orders (order_id, customer_id, order_date, amount) VALUES (?, ?, ?, ?)",
orders,
)
conn.commit()
conn.close()This function creates a SQLite file called sales.db, with two tables: customers and orders. We insert sample customers and sample orders. The two tables are shown below. I am keeping everything intentionally simple to make things clearer.
Now let's create a database wrapper.
def get_database(db_path: str = "sales.db") -> SQLDatabase:
    return SQLDatabase.from_uri(f"sqlite:///{db_path}")
This function returns a LangChain SQLDatabase object. This is important because it gives us a higher-level interface. Instead of manually managing connections everywhere, we can do:
db.get_table_info()
db.run("SELECT * FROM customers")
Define agent state
This is one of the most important ideas in LangGraph. Remember earlier, I said a state is a notebook that is shared by all nodes. The nodes read from it and write to it.
class AgentState(TypedDict):
    question: str
    tables: Optional[str]
    schema: Optional[str]
    sql_query: Optional[str]
    sql_result: Optional[str]
    error: Optional[str]
    retries: int
    max_retries: int
    final_answer: Optional[str]
Let’s understand each field in the state we’ve defined. Note that the state will have different fields as per use case.
- question: The original user question. Example:
"Which customer spent the most money overall?" - tables: A string listing tables found inside the database. Example:
customers, orders - schema: The detailed schema text for the tables. This helps the model know columns and relationships.
- sql_query: The SQL generated by the model.
- sql_result: The raw result returned by the database.
- error: If the SQL fails, the error message is stored here. The LLM can use the error message to correct itself.
- retries: How many failed attempts have happened so far.
- max_retries: The upper limit. This prevents infinite loops. Note that LLM inferences are expensive, so there should be a limit defined.
- final_answer: The final natural-language response shown to the user.
Getting an LLM
Now, we need to get an LLM. For this, let’s create a function that returns the LLM object. This keeps things simple and reusable. Later, if we want to change the LLM, this is the code block that will need a change.
def get_llm() -> ChatOpenAI:
    return ChatOpenAI(model="gpt-4o-mini", temperature=0, api_key=GROQ_API_KEY)
Why is temperature=0? Temperature actually controls randomness. A higher value makes the LLM more creative and a lower value makes the LLM more deterministic. Since our task at hand is SQL generation, stability should be the focus rather than creativity. I’ll leave this up to you to experiment, but for now, continue with the value 0.
Creating Nodes
Each node is just a Python function that: (i) receives the current state, (ii) does a job, and (iii) returns an updated state. Remember this pattern. Now, keeping everything self-explanatory, let’s create some nodes.
Node: List tables
def list_tables_node(state: AgentState) -> AgentState:
    db = get_database()
    tables = db.get_usable_table_names()
    return {
        **state,
        "tables": ", ".join(tables),
    }
This list_tables_node function takes all existing fields in the current state and updates only the tables field. The tables field will now have a string:
"customers, orders"Node: Get schema
def get_schema_node(state: AgentState) -> AgentState:
    db = get_database()
    schema_text = db.get_table_info()
    return {
        **state,
        "schema": schema_text,
    }
This get_schema_node function fetches schema information for the database, which includes table names, columns, data types, etc. With this information available, our agent knows which columns exist, which table contains what, and how tables may relate to each other.
Node: Generate SQL
def generate_sql_node(state: AgentState) -> AgentState:
    llm = get_llm()

    prompt = f"""
You are a careful SQL assistant.

Your job is to write a valid SQLite query based on the user question.

Rules:
- Use ONLY the tables listed below.
- Use ONLY columns that exist in the schema.
- Return ONLY SQL.
- Do not include markdown.
- Do not include explanation.
- If there was a previous error, fix the SQL using that error.

User question:
{state['question']}

Available tables:
{state['tables']}

Schema:
{state['schema']}

Previous error:
{state['error']}
"""

    response = llm.invoke(prompt)
    sql_query = response.content.strip()

    return {
        **state,
        "sql_query": sql_query,
    }
This node asks the LLM to write SQL. This part is the heart of the SQL generating step. This is where we provide the LLM with a comprehensive picture of what is currently happening in the workflow. The LLM is explicitly provided a prompt: rules, tables, schema, previous errors if any. If there was a previous error, state['error'] contains it, which becomes context for the LLM to retry generating valid SQL. Based on the provided prompt, the LLM generates SQL, which is stored in the sql_query field of the current state.
Node: Execute SQL
def execute_sql_node(state: AgentState) -> AgentState:
    db = get_database()

    try:
        result = db.run(state["sql_query"])
        return {
            **state,
            "sql_result": str(result),
            "error": None,
        }
    except Exception as e:
        return {
            **state,
            "sql_result": None,
            "error": str(e),
            "retries": state["retries"] + 1,
        }
This is where the insanity of the LLM is checked. The generated SQL is executed on the database. If SQL works, save the result in sql_result, and error is None. If SQL fails, the exception message is stored in error and retries is incremented by 1. This is how the next SQL generation step gets the feedback.
Router: Should we retry?
def route_after_execution(state: AgentState) -> str:
    if state["error"] is None:
        return "generate_answer"

    if state["retries"] < state["max_retries"]:
        return "generate_sql"

    return "fail"
This is an example of a conditional edge. In the above example, there are three possible cases based on the current state.
- Case 1: If execution succeeded, the workflow moves to answer generation.
- Case 2: If error exists but retries remain, the workflow goes back to SQL generation.
- Case 3: If error exists and no retries remain, the workflow stops and returns a failure message.
This kind of conditional edge is critical in implementing non-linear workflows in agent systems. Therefore, always remember the pattern: try -> inspect -> retry or continue.
Node: Generate final answer
def generate_answer_node(state: AgentState) -> AgentState:
    llm = get_llm()

    prompt = f"""
You are a helpful data assistant.

Given the user question, the SQL query, and the SQL result,
write a clear natural language answer.

User question:
{state['question']}

SQL used:
{state['sql_query']}

SQL result:
{state['sql_result']}

Write a short, accurate, easy-to-understand response.
"""

    response = llm.invoke(prompt)

    return {
        **state,
        "final_answer": response.content.strip(),
    }
This step converts raw SQL results into natural language.
At this point in the code, I think this block of code is quite self-explanatory. And I am sure you get the idea of the state and why I was referring to it as the notebook all this time.
Why not show raw SQL results directly? You can do it. But do you really want to? Users usually ask business questions and not database questions, so I think a final answer in natural language makes sense.
For instance, the database might return something like:
[("Charlie", 650.0)]And the user might want:
Charlie spent the most money overall, with a total of $650.00.If this is the case, this node does this job. Otherwise, it is always up to you what kind of agent system you want to achieve.
Node: Failure answer
def fail_node(state: AgentState) -> AgentState:
    return {
        **state,
        "final_answer": (
            f"I could not complete the SQL query after {state['max_retries']} retries. "
            f"Last error: {state['error']}"
        ),
    }
Well, this is the last node for our workflow. Not every workflow succeeds, and I think that is normal. Therefore, there should be a fallback response instead of a mysterious crash. This fail_node function exactly does this job. In real world projects, we might want to replace this with logging, human escalation, a fallback LLM, or other sophisticated handling.
Building the LangGraph workflow
Now that we've defined what each node does, it is time to build the graph. LangGraph really shines in this part.
def build_agent():
    graph = StateGraph(AgentState)

    graph.add_node("list_tables", list_tables_node)
    graph.add_node("get_schema", get_schema_node)
    graph.add_node("generate_sql", generate_sql_node)
    graph.add_node("execute_sql", execute_sql_node)
    graph.add_node("generate_answer", generate_answer_node)
    graph.add_node("fail", fail_node)

    graph.add_edge(START, "list_tables")
    graph.add_edge("list_tables", "get_schema")
    graph.add_edge("get_schema", "generate_sql")
    graph.add_edge("generate_sql", "execute_sql")

    graph.add_conditional_edges(
        "execute_sql",
        route_after_execution,
        {
            "generate_answer": "generate_answer",
            "generate_sql": "generate_sql",
            "fail": "fail",
        },
    )

    graph.add_edge("generate_answer", END)
    graph.add_edge("fail", END)

    return graph.compile()
At first, we create a graph whose shared state follows the AgentState structure.
Next, we add nodes. For instance, graph.add_node("list_tables", list_tables_node) registers list_tables_node() Python function as the list_tables node. This way, we register each Python function we defined earlier as a named node.
Our next job is to add edges. And there are two types: direct edge and conditional edge. For instance, the four graph.add_edge lines define the linear part of the workflow. That means from the START node, the next node is list_tables, and then the next one is get_schema and so on. However, the conditional edge is the most interesting part and is what makes our agent system non-linear. After execute_sql, the workflow goes to the router_after_execution node, and whatever string the node returns determines the next node. There are three cases:
- If
router_after_executionreturns "generate_answer" it goes togenerate_answernode. - If
router_after_executionreturns "generate_sql", it loops back to thegenerate_sqlnode. - If
router_after_executionreturns "fail", it goes to thefailnode.
And the final END node ends the workflow. graph.compile() turns the graph definition into an executable workflow.
Running the Agent
Now that we've created the complete workflow, it is time to run the agent. For this, we need to define an initial state. We only need to assign the question and max_retries fields, set retries to 0 (since this is initial state), and all other fields to None.
Let's ask the following question: "Which customer spent the most money overall?"
def main():
    create_sample_database()
    agent = build_agent()

    question = "Which customer spent the most money overall?"

    initial_state: AgentState = {
        "question": question,
        "tables": None,
        "schema": None,
        "sql_query": None,
        "sql_result": None,
        "error": None,
        "retries": 0,
        "max_retries": 3,
        "final_answer": None,
    }

    result = agent.invoke(initial_state)

    print("\nQUESTION:")
    print(result["question"])
    print("\nSQL QUERY:")
    print(result["sql_query"])
    print("\nSQL RESULT:")
    print(result["sql_result"])
    print("\nFINAL ANSWER:")
    print(result["final_answer"])


if __name__ == "__main__":
    main()
Here is the response I got from the agent. Wow, it works!
QUESTION:
Which customer spent the most money overall?

SQL QUERY:
SELECT c.customer_id, c.name, SUM(o.amount) AS total_spent
FROM customers c
JOIN orders o ON c.customer_id = o.customer_id
GROUP BY c.customer_id, c.name
ORDER BY total_spent DESC
LIMIT 1;

SQL RESULT:
[(3, 'Charlie', 650.0)]

FINAL ANSWER:
The customer who spent the most overall is Charlie (customer ID 3), with total purchases amounting to $650.00.
Using another LLM
This is the reason why using LangChain is exciting. Swapping the LLM providers in the above workflow is quite easy. To use OpenAI’s GPT-5.4, all you do is:
Import ChatOpenAI and make a small change in the get_llm() function.
# install langchain-openai
pip install -U langchain-openai

from langchain_openai import ChatOpenAI
OPENAI_API_KEY = "YOUR_OPENAI_API_KEY"

def get_llm() -> ChatOpenAI:
    return ChatOpenAI(model="gpt-5.4", temperature=0, api_key=OPENAI_API_KEY)
Here's what GPT-5.4 responded for the same question:
QUESTION:
Which customer spent the most money overall?

SQL QUERY:
SELECT c.name
FROM customers c
JOIN orders o ON c.customer_id = o.customer_id
GROUP BY c.customer_id, c.name
ORDER BY SUM(o.amount) DESC
LIMIT 1;

SQL RESULT:
[('Charlie',)]

FINAL ANSWER:
Charlie spent the most money overall.
What Next?
Now that we’ve seen the agent working end to end, the next step is to think about how this pattern applies beyond this example. The database itself is not the important part. What matters is the workflow. In this guide, a relational database was used, but the same idea works with any database or even a mix of data sources. APIs, documents, or other systems can be connected, letting the agent choose the right tool.
It also helps to add a few guardrails early. Database access can be limited to read-only where possible. Logging helps with debugging. Sending less schema reduces LLM inference cost. Structured outputs give more control. A fallback model can handle failures. This is how a small prototype becomes reliable enough for production.
I think it’s time for me to stop, right here. This is already a long and tiring guide.
I’ll see you in another one. 🤗